

Subscribe to our one-month free trial, without commitment!



Is your phone ringing off the hook? Are appointment requests pouring in by text, email, Facebook and phone? So much so that you're seriously thinking about hiring someone to help?
What if you let AssisTime book your appointments for you?
AssisTime gives you an online booking portal where your clients book their own appointments, based on your availability, without interrupting you.
In this article, you'll see how to set up online appointment booking in four steps: your appointment types, your locations, your availability and your portal.
All the settings are in the main menu (the three-line icon at the top left), under Calendar. Appointment types, locations and portal options are grouped under Customize; your working hours are under My availability.
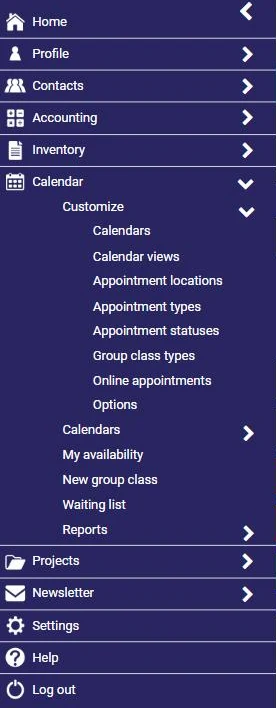
Appointment types are the services your clients will be able to book. Go to Calendar, Customize, Appointment types, then click Add or an existing type:
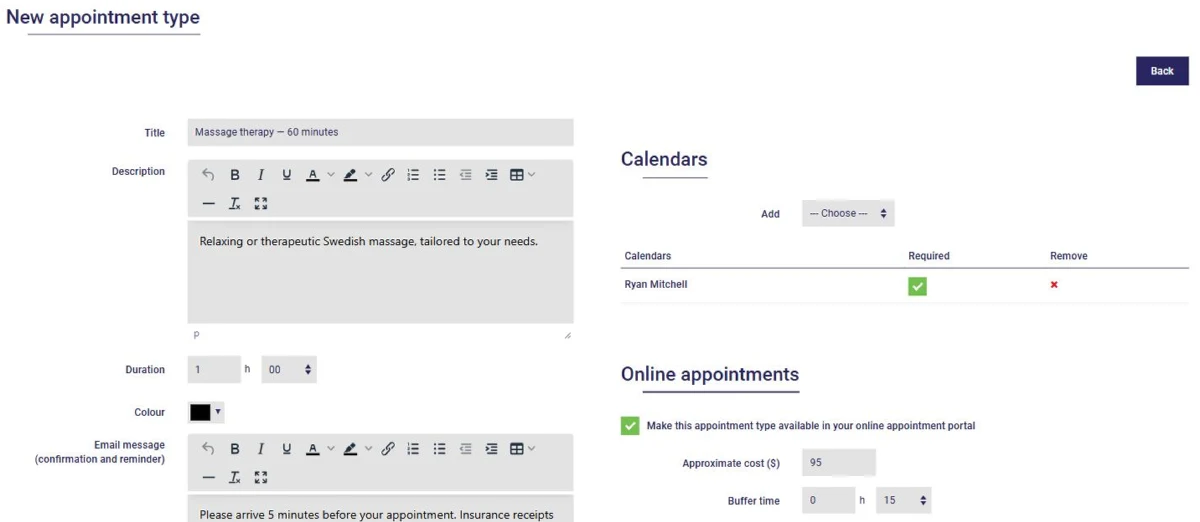
For each type, you set a title, a description, a duration and a colour (the colour of the appointment in your calendar). You can also add a message that will be included in the confirmation and reminder emails for this appointment type, such as "Please arrive 5 minutes before your appointment."
In the Online appointments section, check the box to offer this appointment type on your portal. You can then specify:
If you work as a team, the Calendars section lets you choose the calendars that offer this appointment type. And if you subscribe to the accounting module, you can link products or services to the appointment type to invoice in one click from the appointment (see this article), and even require payment or a credit card when clients book online.
You can also watch this video for more information:
Next, tell AssisTime where you see your clients. Go to Calendar, Customize, Appointment locations, then click Add:
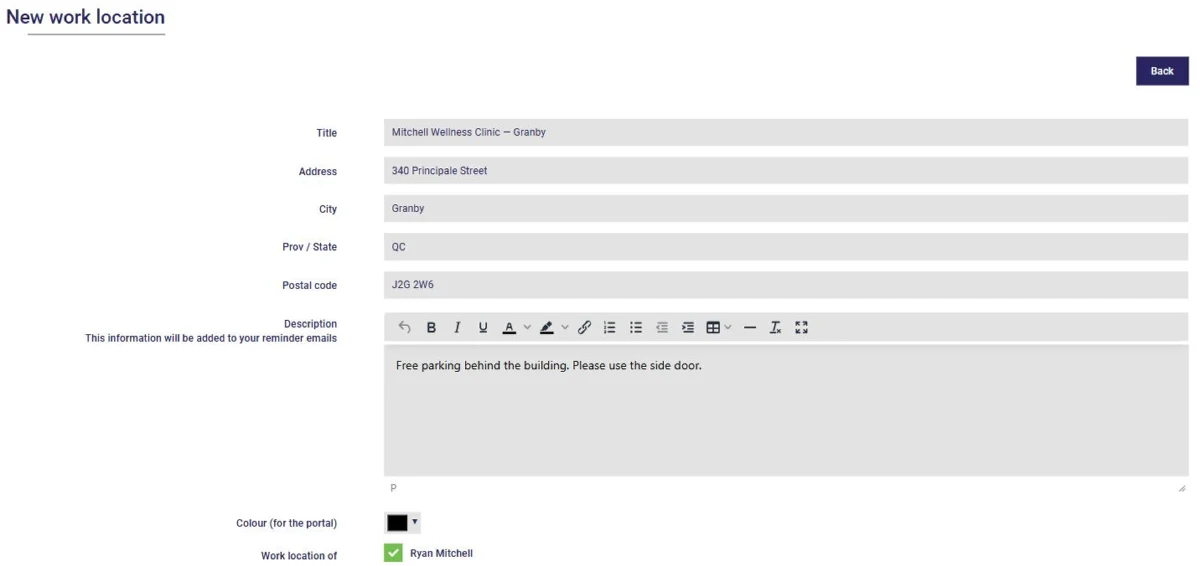
Enter the name and address of the location. The description (parking, which entrance to use, floor…) will be added to your reminder emails. You can also choose a colour for the portal and, if there are several of you, indicate who works at this location. A location can also be virtual, for your video meetings.
For your clients to book, you need to offer them availability slots. Go to Calendar, My availability: your week is displayed. Click a time slot to add availability:
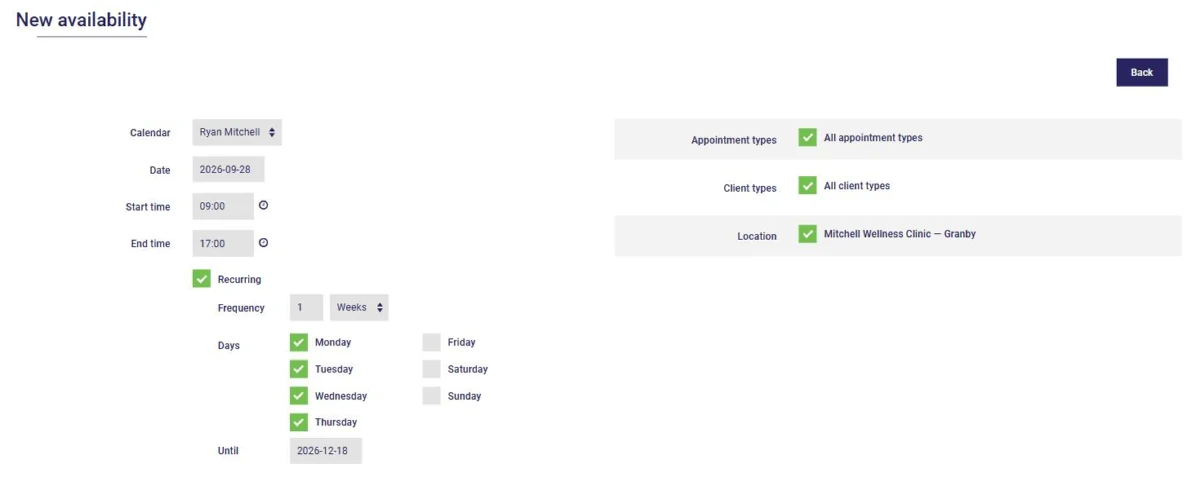
You set the calendar, the date and the start and end times of the slot, then, on the right, the appointment types, client types and locations offered during that slot. Check Recurring to repeat it: every week (or every two weeks, for example), on the days you choose, until the date you specify. In a few seconds, your schedule for the coming months is in place.
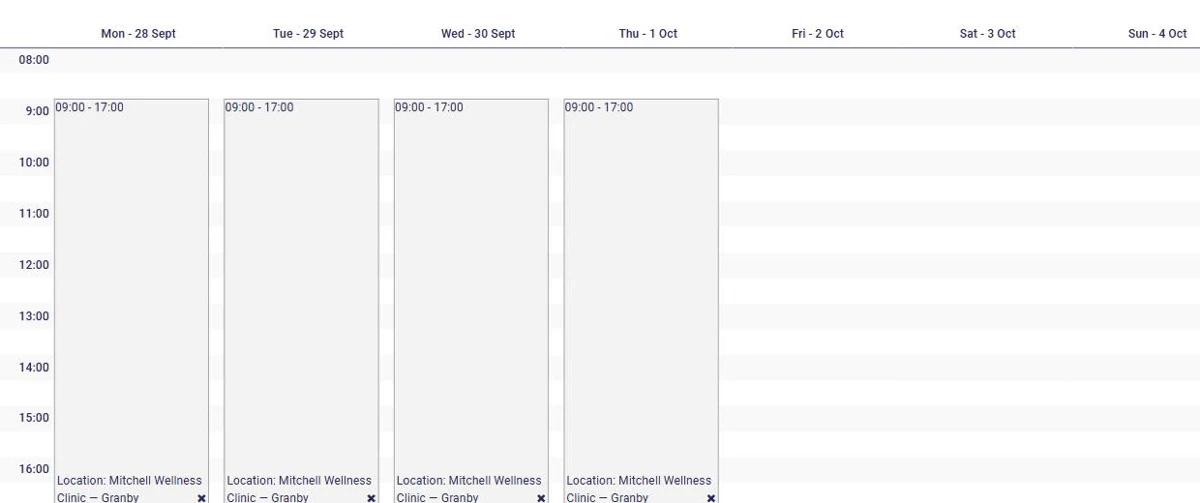
Your slots then appear in grey in the availability calendar:
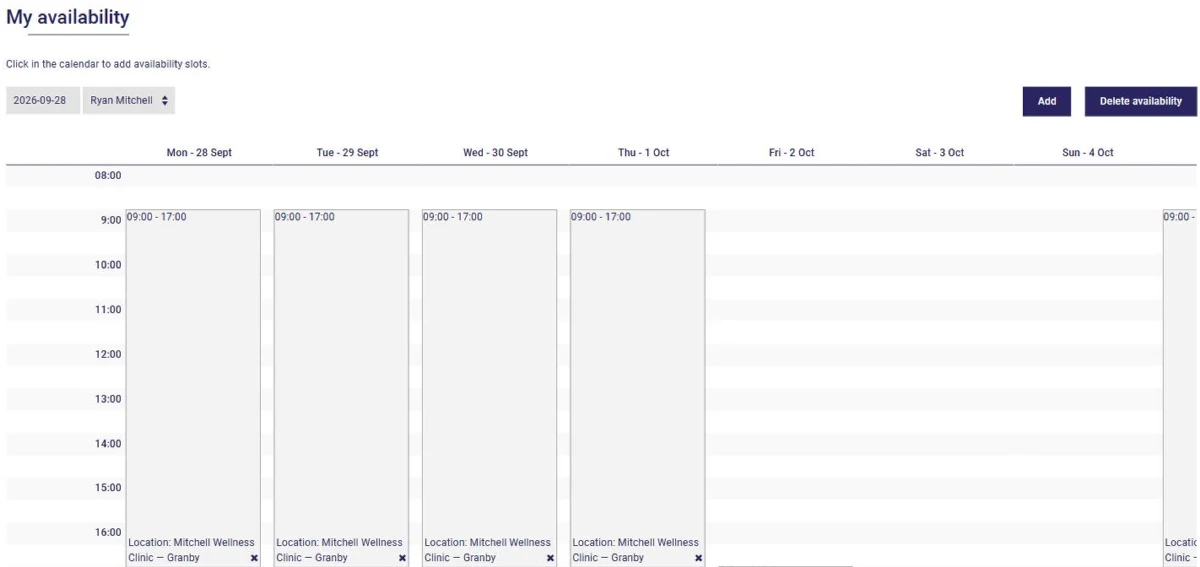
Click a slot to edit or delete it. The Delete availability button lets you remove several at once, for example during your vacation.
Last step: set up your portal. Go to Calendar, Customize, Online appointments. At the very top, check I want my clients to be able to book appointments with me through AssisTime: this is what turns your portal on.
The settings are grouped into tabs:
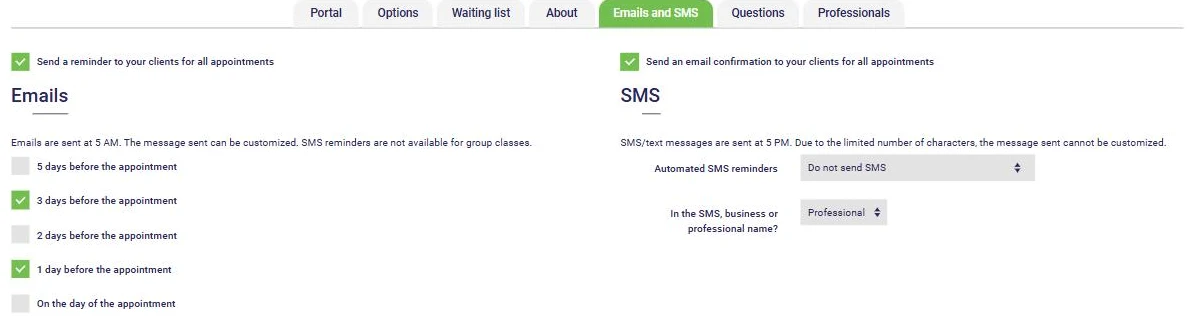
In the Emails and SMS tab, choose to send an email confirmation for each booking and reminders 5 days, 3 days, 2 days or 1 day before the appointment, or on the same day; you can check more than one. Email reminders go out early in the morning. You can also send text message (SMS) reminders, at the end of the day (see this article).
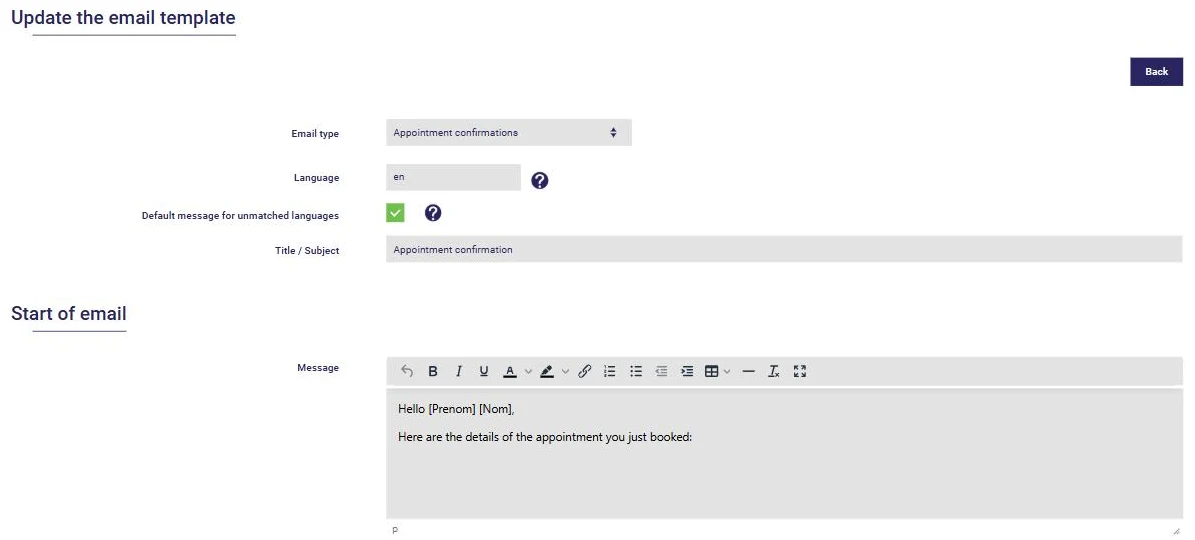
Finally, the Customize emails button at the bottom of this tab lets you edit the text of your confirmation and reminder emails. You can use variables such as [Prenom] and [Nom], which will be replaced with your client's details, and create one version per language.
Don't forget to click Save once you've finished your settings.
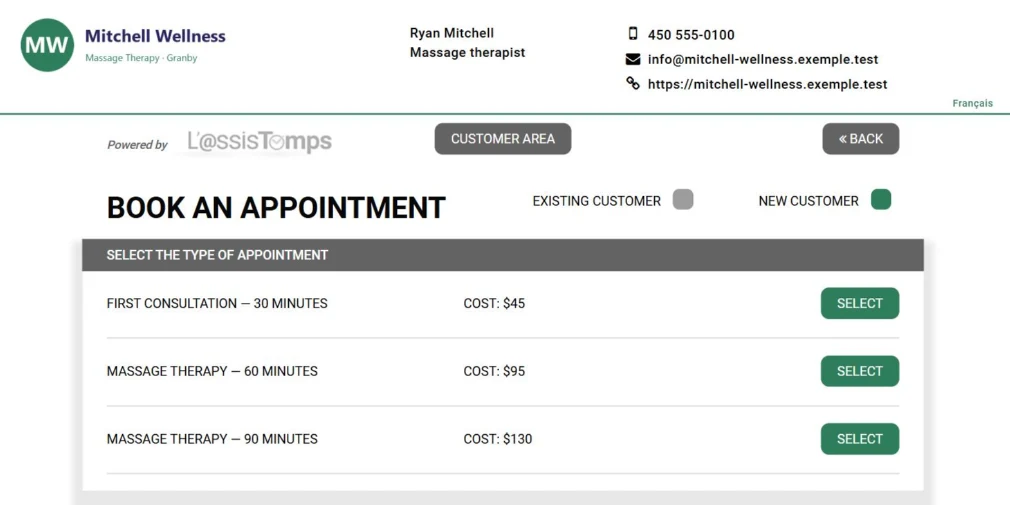
Here's what your portal looks like to your clients. They indicate whether they are new or existing clients, then choose the appointment type:
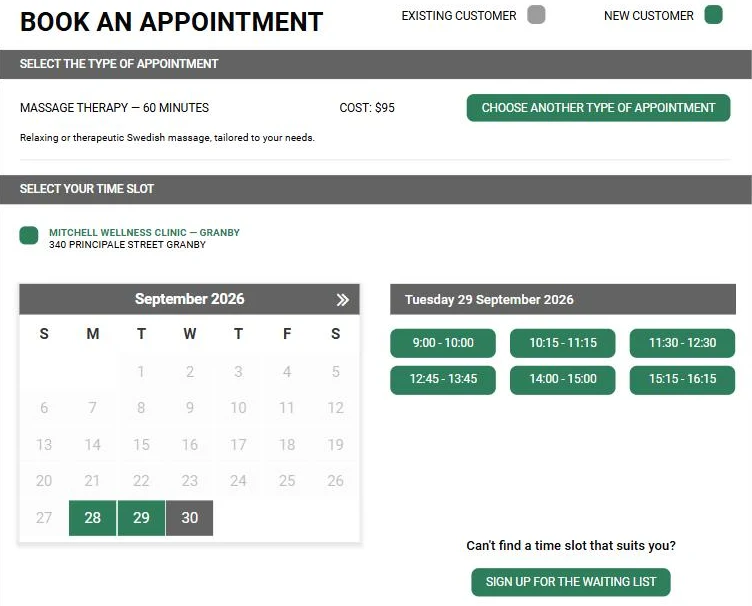
They then choose the location, date and time that suit them from your availability. If no slot works for them, they can sign up on your waiting list:
The appointment is then added to your calendar and your client receives a confirmation. That's how you can let AssisTime fill your calendar!
Subscribe to our one-month free trial, without commitment!
You will be charmed by the interface and the ease of use!
