

Subscribe to our one-month free trial, without commitment!



Managing your waiting list and appointment cancellations can take up a lot of time. Fortunately, AssisTime handles much of it for you!
Open the main menu (the three-line icon at the top left), then go to Calendar, Customize, Online appointments. The settings are on the Waiting list and Options tabs.
On the Waiting list tab, choose who can sign up for your waiting list under the question I want my clients to be able to sign up on my waiting list: all your clients (Yes), no one (No), existing clients only or new clients only.
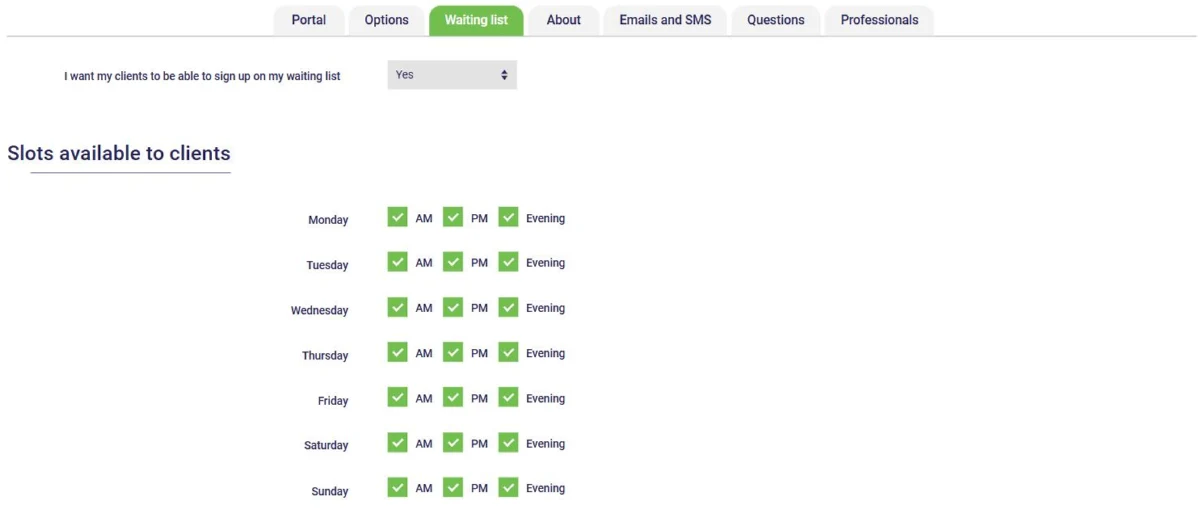
Just below, check the time periods your clients can select as their availability for each day of the week: morning, afternoon or evening. That way, you'll know when to call them back if a spot opens up.
When none of the time slots on your portal suits them, your clients see a button to sign up for your waiting list. You can also give them the direct link to the waiting list, shown on the Portal tab. With each sign-up, you receive an email with the client's contact information and availability. And if you'd like to ask them questions, add them on the Questions tab (see this article).
You can view and manage your waiting list under Calendar, Waiting list, or with the Waiting list button in your calendar.
On the Options tab, the question Can your clients cancel their appointment without contacting you? determines whether your clients can cancel on their own, using the link in their emails or from their customer area.
The next question, If a client cancels, make the slot available?, determines what happens to the freed-up time slot:

Don't forget to click Save. You now have more control over your appointment slots, effortlessly!
Subscribe to our one-month free trial, without commitment!
You will be charmed by the interface and the ease of use!
