

Subscribe to our one-month free trial, without commitment!



Are you always short on time? Do you rush from one client to the next all day long?
If so, you're probably looking for ways to make the most of your time. You've come to the right place: AssisTime was designed to make your admin tasks easier!
In this article, you'll see how to save time by creating your invoices from your appointments, in a single click.
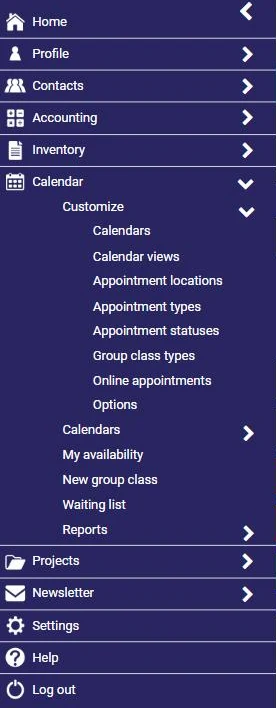
The first step is to link your products and services to your appointment types. Open the main menu (the three-line icon at the top left), then go to Calendar, Customize, Appointment types:
Click an existing appointment type or create a new one (see this article). In the Accounting section, check the Enable invoicing from this appointment type box, then add the product(s) and service(s) to invoice, with their quantity:
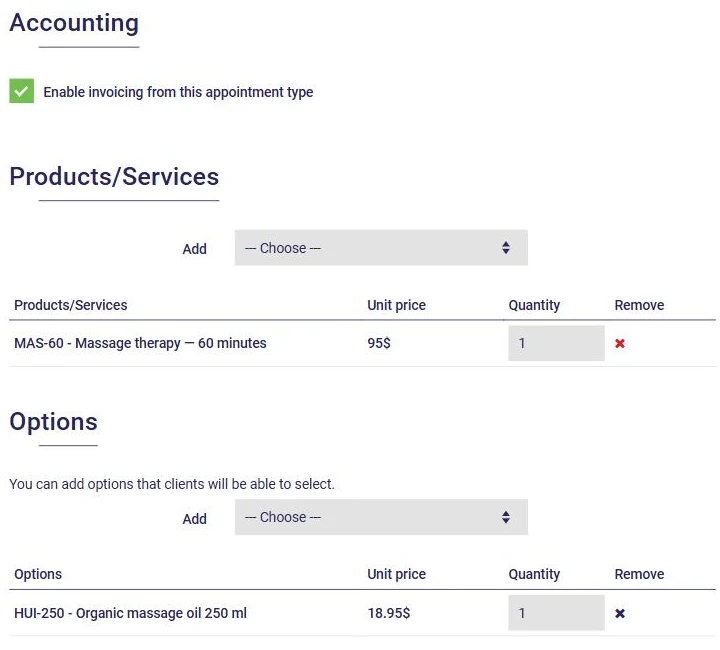
The Options section lets you add products or services that your clients can choose themselves when they book on your online booking portal, such as a massage oil. Don't forget to click Save.
For an appointment to be billable, it needs two pieces of information:
Note that you can choose more than one appointment type for the same appointment: the durations and the invoiced products and services add up.
Appointments booked by your clients on your online booking portal already include both pieces of information: they're billable right from the start.
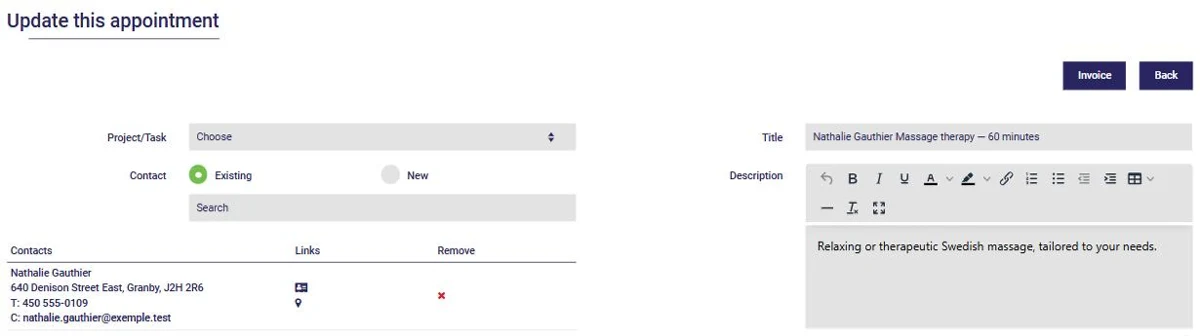
Open the appointment from your calendar. If it's billable, an Invoice button appears at the top right:
Click Invoice: a new invoice opens in your client's name, with the products and services of the appointment type and the prices and taxes already calculated.
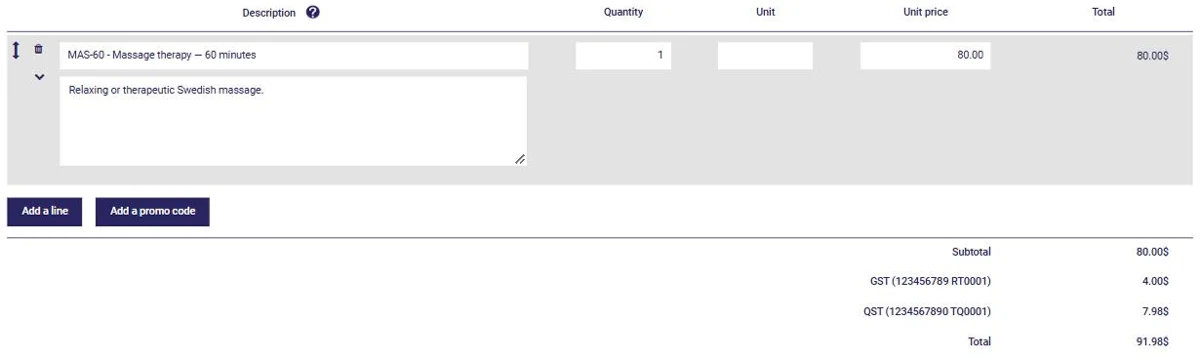
You can edit it if needed (add a line, a promo code…), then click Complete to record it, email it to your client or download it as a PDF. The Save for later button keeps it in progress without completing it.
If your client already has an invoice in progress, AssisTime asks whether you want to create a new invoice or add the appointment to the invoice in progress. To group several appointments at once, read our article How to Group Several Appointments on a Single Invoice.
Once the appointment has been invoiced, the Invoice button is replaced by View invoice: you can get back to the invoice in one click, and you avoid invoicing the same appointment twice.
The minutes you save will give you a bit more breathing room between clients: you'll feel less like you're always running!
And to go even further, your clients can pay when they book online: find out how in our article Invoice Your Clients from Your Online Appointment Booking Portal.
Subscribe to our one-month free trial, without commitment!
You will be charmed by the interface and the ease of use!
