

Subscribe to our one-month free trial, without commitment!


You've just created a project in AssisTime (see this article), and its record is now in front of you. In this second article, learn how to use this tool to get the most out of it!
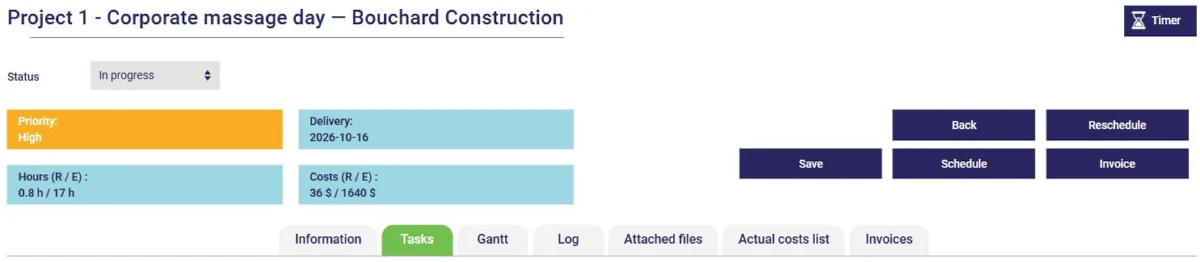
At the very top are the project's number and title, followed by its status: In progress, Pending, Ready to invoice, Completed, Cancelled… You can adapt this list of statuses to the way you work.
The indicators just below give you the project's status at a glance:
Information shows the data entered when the project was created, which you can edit.
Tasks lets you break your project down into tasks, each with its actual over estimated hours and costs, priority, status and planned delivery date:
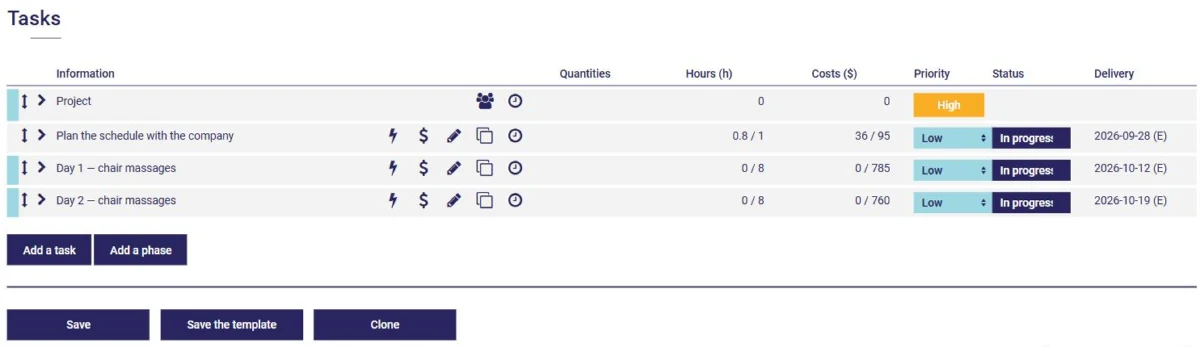
Drag tasks by the handle on the left to change their order. The icons on each line let you invoice the task, edit it, duplicate it or log time on it. The Add a phase button groups your tasks into major stages. We'll look at tasks in detail in the article Breaking Your Project Down into Tasks.
Gantt shows your tasks on a timeline, with one colour per status and a red line for today:

Log lets you add dated notes about the project (calls, decisions, changes requested by the client…).
Attached files gathers the documents related to the project.
Actual costs list gives you the details of your timesheets and expenses for the project, with their dates.
Invoices shows the invoices already issued for this project.
The Save the template button saves the project's structure (tasks and resources) so you can reuse it for a future project. The Clone button creates a copy of the project, for example for a recurring project.
And there you have it! You now know the buttons, indicators and tabs of the project record. It will become a valuable ally for your business!
Subscribe to our one-month free trial, without commitment!
You will be charmed by the interface and the ease of use!
