

Subscribe to our one-month free trial, without commitment!



How do you remember how many hours you've spent on each of your projects? And how do you get a record that's ready to invoice?
The AssisTime Projects module is the tool you need! In this first article of a series on project management, find out how to create a project that fits your needs.
Open the main menu (the three-line icon at the top left), then go to Projects, New project. You can also click Add a project at the top of your project list.
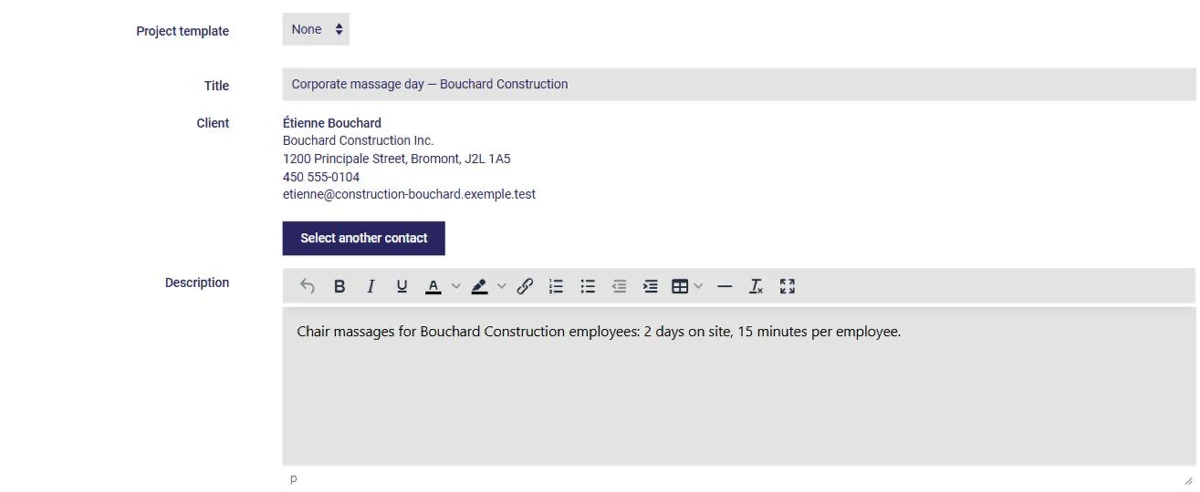
At the very top, the Project template field lets you start from a standard project you've already saved, with its tasks and resources. We'll come back to this below.
Give your project a title, then choose your client: search for them by name, or choose New to create them on the spot. Then add the project description.
Further down, you set the project's priority (low, medium, high or urgent), its start date and its delivery date:
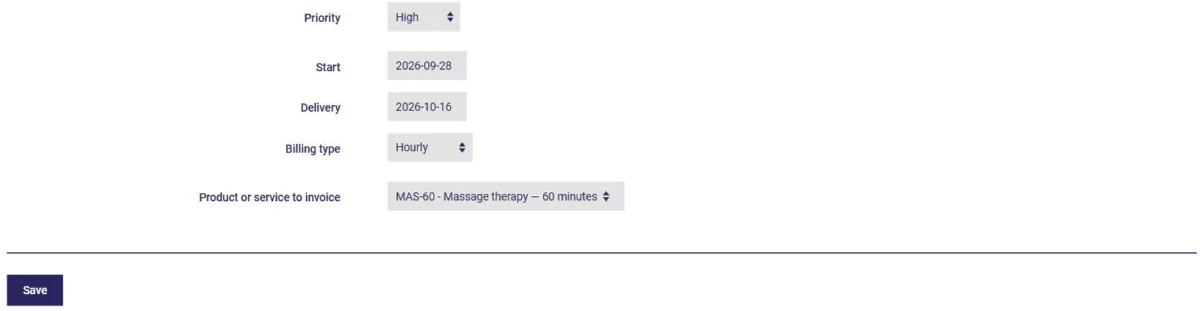
Finally, choose the billing type:
Click Save: your project is created and its record opens. You can then add tasks to it, log your time and invoice (see the next article).
All your projects are grouped under Projects, Projects:
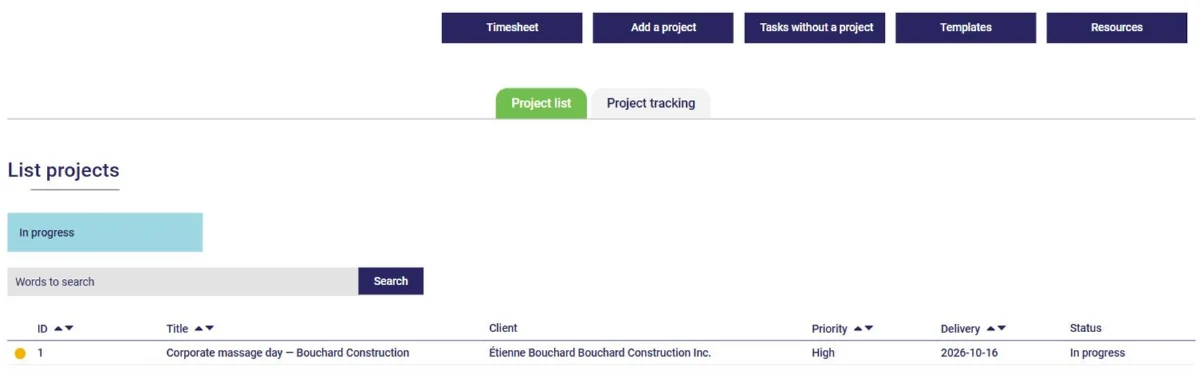
The colour dot to the left of each project shows you at a glance which ones need your attention: it takes into account the project's priority, but also how close its delivery date is and whether the planned hours have been exceeded. Even a low-priority project changes colour as its delivery date approaches!
At the top of the list, you can also access timesheets, tasks without a project, your templates and your resources. The Project tracking tab displays your projects in columns, by status.
Do you often work on similar projects? Once your project is well structured, click Save the template at the bottom of its record. For your next project, choose that template in the Project template field: the tasks and resources are carried over automatically. You can also manage your templates under Projects, Project templates.
And there you have it! You now know how to create a project and track the time you spend on it!
Subscribe to our one-month free trial, without commitment!
You will be charmed by the interface and the ease of use!
