

Subscribe to our one-month free trial, without commitment!



Do you waste a ton of time creating your invoices? Time you'd rather spend with your next client?
Invoicing matters in any business, but it shouldn't eat into the time you need to serve your clients.
AssisTime was designed so you spend as little time as possible on invoicing and can focus on what you do best! In this article, you'll see how to set up AssisTime and issue your invoices quickly and easily.
Your invoices need to show certain information about your business: your contact details, your logo, your tax numbers, and so on. Open the main menu (the three-line icon at the top left), then go to Profile, Profile and business.
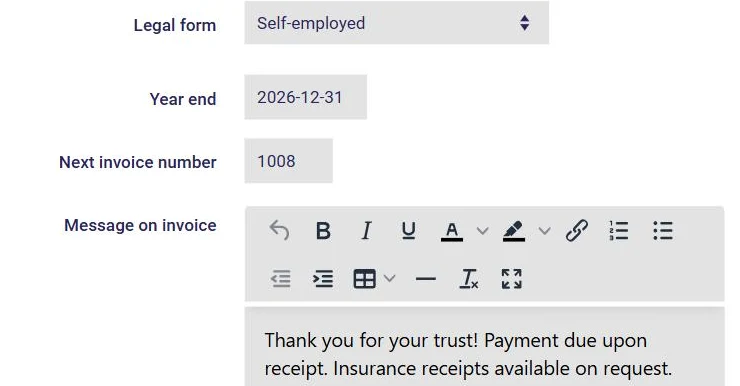
There, you enter your business contact details and logo, which will appear at the top of your invoices, as well as your tax numbers (see this article). You can also set the next invoice number and write a message that will appear by default on all your invoices, such as your payment terms:
Finally, under Accounting, Customize, enter your Products / Services with their prices and taxes: all you'll have to do is pick them on your invoices. The Invoice template option also lets you adjust how your invoices look.
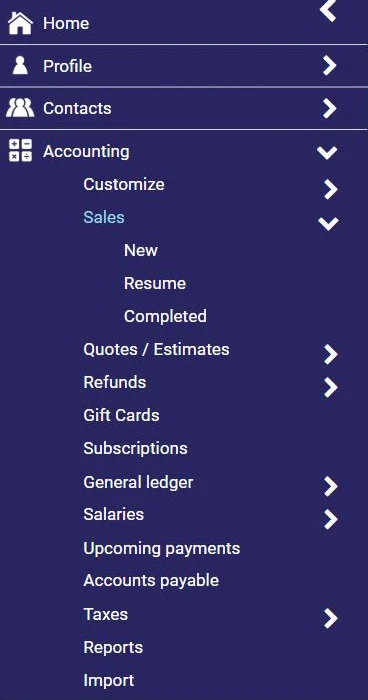
There are several ways to create an invoice. From the menu, go to Accounting, Sales, New:
Today's date is filled in automatically; you can change it and enter a purchase order (PO) number if needed.
Next, choose your client. If they're already in your contacts, type a few letters of their first or last name in the search box: the results appear below, and you just have to check your client's box. Their contact details are added to the invoice:
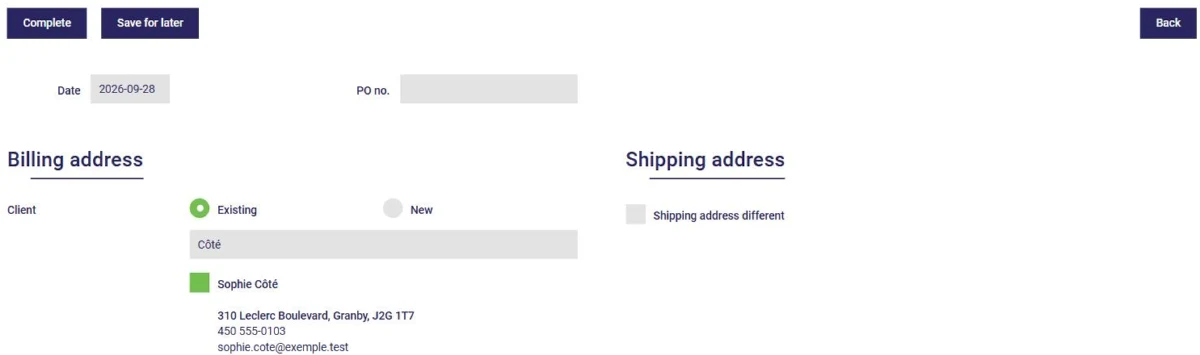
If it's a new client, choose New instead and enter their contact details: they will automatically be added to your contacts. If needed, check Different shipping address.
Type the first few letters of the product or service sold in the Description column: AssisTime suggests matching choices. Click the right one, and the line fills in with the description, quantity and unit price; the taxes and the invoice total update automatically:
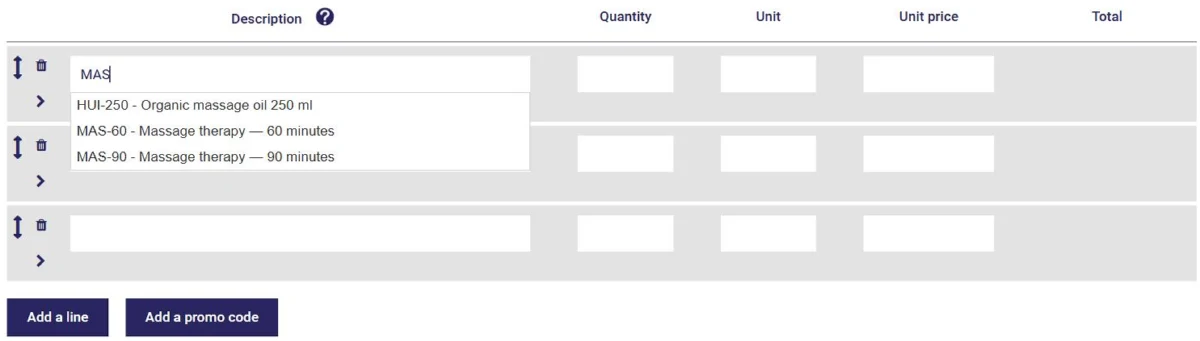
Adjust the quantity if needed and add lines with the Add a line button. If the product or service doesn't exist yet, just enter its description, quantity and price. The Add a promo code button lets you apply a discount, and the Message section at the bottom of the invoice shows your default message, which you can edit.
Finally, click Complete to record your invoice. You then land on this screen:
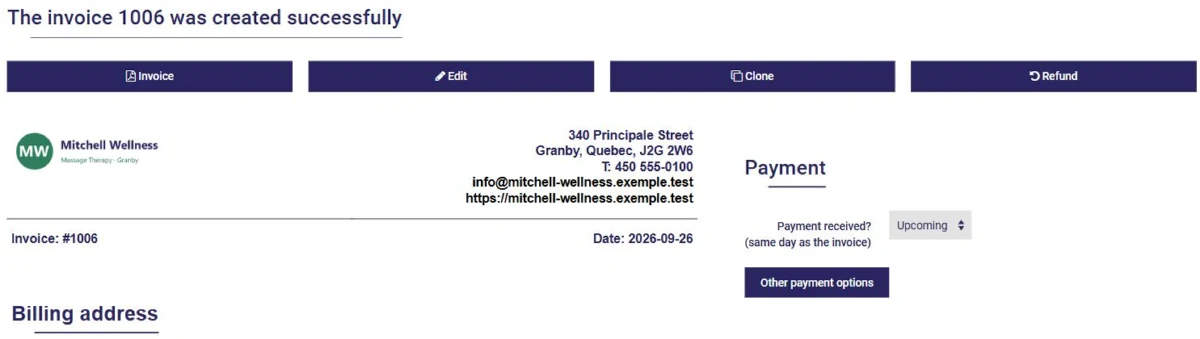
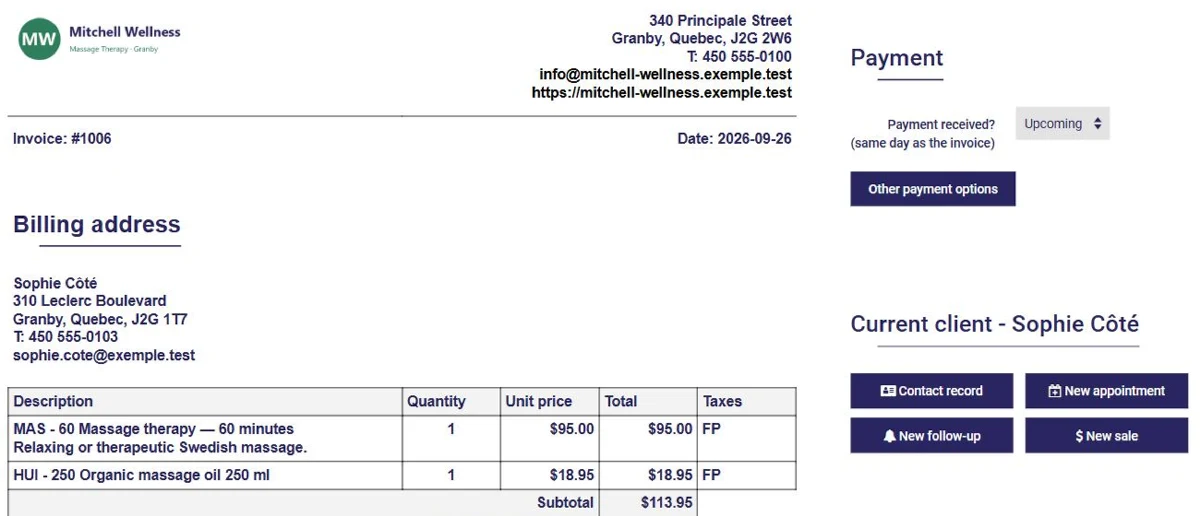
From here, you can open the invoice as a PDF (Invoice button), email it to your client, edit it, clone it or refund it. On the right, the Payment section lets you record the payment received, or leave the invoice as Upcoming if your client will pay later.
No time to finish? Click Save for later instead. You'll find your invoice under Accounting, Sales, Resume. All your completed invoices are available under Accounting, Sales, Completed.
Here are a few tips to save even more time:
With AssisTime, creating your invoices is child's play: you focus on what you do best while doing something good for the environment!
Subscribe to our one-month free trial, without commitment!
You will be charmed by the interface and the ease of use!
