

Subscribe to our one-month free trial, without commitment!



Do you use paper forms to keep information about your clients? One form for the first visit, another for follow-up sessions, and yet another for your assessment results?
Did you know you can turn your paper forms into electronic forms in AssisTime and do away with paper altogether? This article shows you how.
To create or edit electronic forms in AssisTime, open the main menu (the three-line icon at the top left), then go to Contacts, Customize and finally Forms.
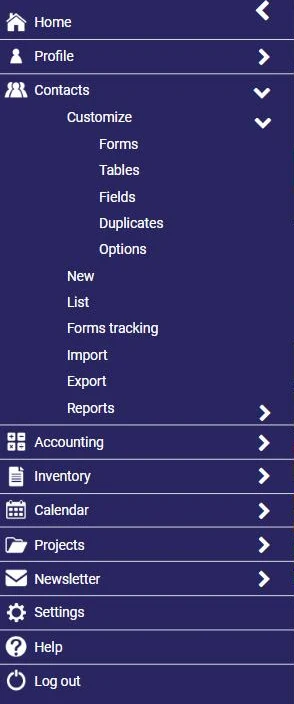
The form manager lists the forms you have already created. Click a form to edit it, or click the Add button at the top right to create a new one:
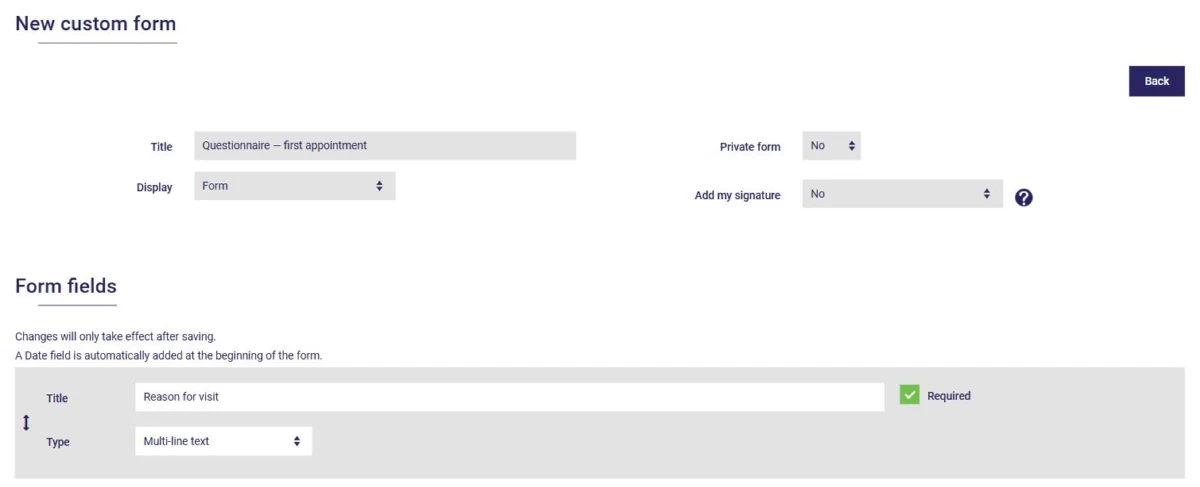
First, set your form's title and choose how it will be displayed in your client records:
If you work as a team, a private form is visible only to you: the other employees in your account can't see its answers. You can also add a signature to it: yours, taken from the signature image uploaded to your profile, or that of the person filling out the form.
Next, add your fields with the Add a field button at the bottom of the page. For each field, enter its title, choose its type and check Required if an answer is mandatory. You can reorder the fields by dragging them with the arrow at the left of each row.
Note that a Date field is automatically added at the top of every form: it will hold the date on which you fill out the form for your client.
When you create a form, you can choose from 13 field types:
For Single choice and Multiple answers fields, enter the possible choices below the field, separated by semicolons (;). For example: Internet;Referred by a friend;Social media;Other.
When your form is done, click the Save button at the bottom of the page. The steps are the same to edit an existing form.
To fill out a form for a client, first open their record, either from your contact list or with the search tool.
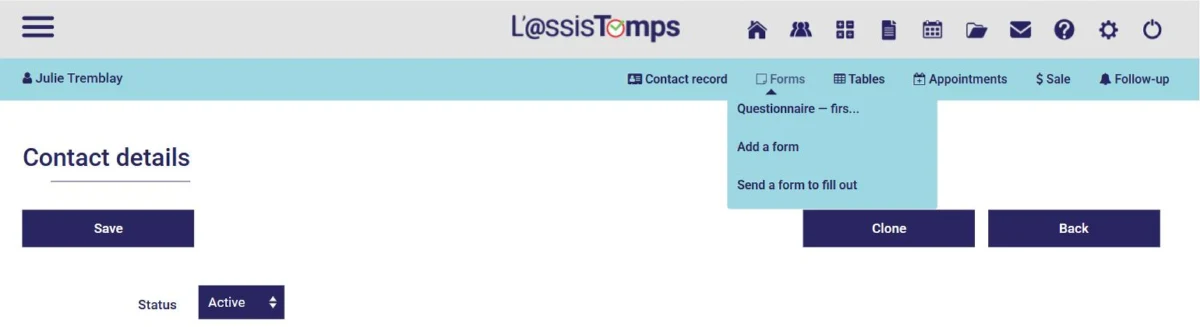
In the client record, hover over Forms in the blue bar at the top of the page, then click Add a form and choose the form to fill out:
The form appears, ready to be filled out:
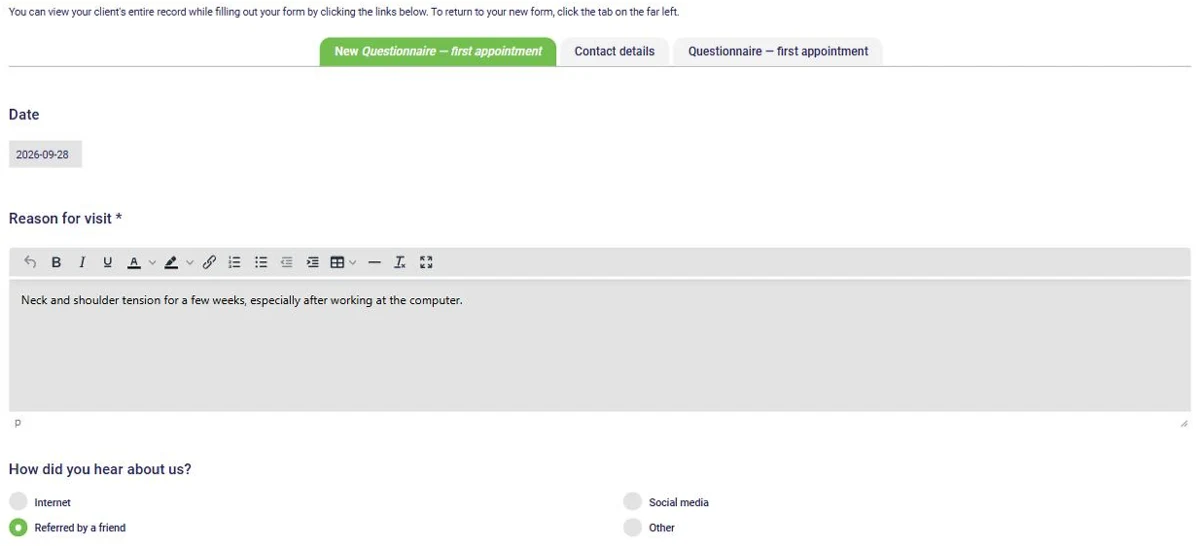
Note that you can look through your client's record while you fill out the form, without leaving it, using the tabs above the form. To return to your form, just click the leftmost tab.
Once saved, the completed form is kept in your client's record, along with the name of the person who filled it out and the date:
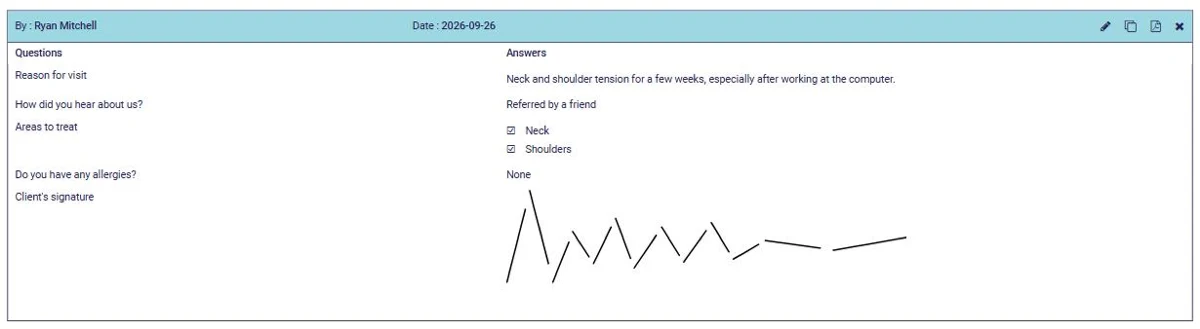
The icons at the top right let you edit the form, duplicate it (handy for a follow-up form that changes little from one visit to the next), download it as a PDF or delete it.
In the same Forms menu of the client record, the Send a form to fill out option lets you email your client a link to the form. They fill it out online, for example before their first appointment, and their answers are added to their record. To learn more, read our article How to Send Custom Forms to Your Clients.
By replacing your paper forms with electronic ones, you'll save on paper, on printing your forms, on the time spent handling all that paper and on storage space in your office. That adds up to significant savings!
Write to us and tell us how you've used AssisTime to get rid of your paper records: we might feature you on this blog!
Subscribe to our one-month free trial, without commitment!
You will be charmed by the interface and the ease of use!
