

Subscribe to our one-month free trial, without commitment!


AssisTime saves you time in many ways, including with your emails! Appointment confirmations and reminders, sending your invoices or your forms: all these emails can be written in your own style thanks to email templates.
Open the main menu (the three-line icon at the top left), then go to Profile, Email templates. This option is available to account administrators only.
The list shows your templates, with their type and language:

Click a template to edit it, or click Add to create a new one.
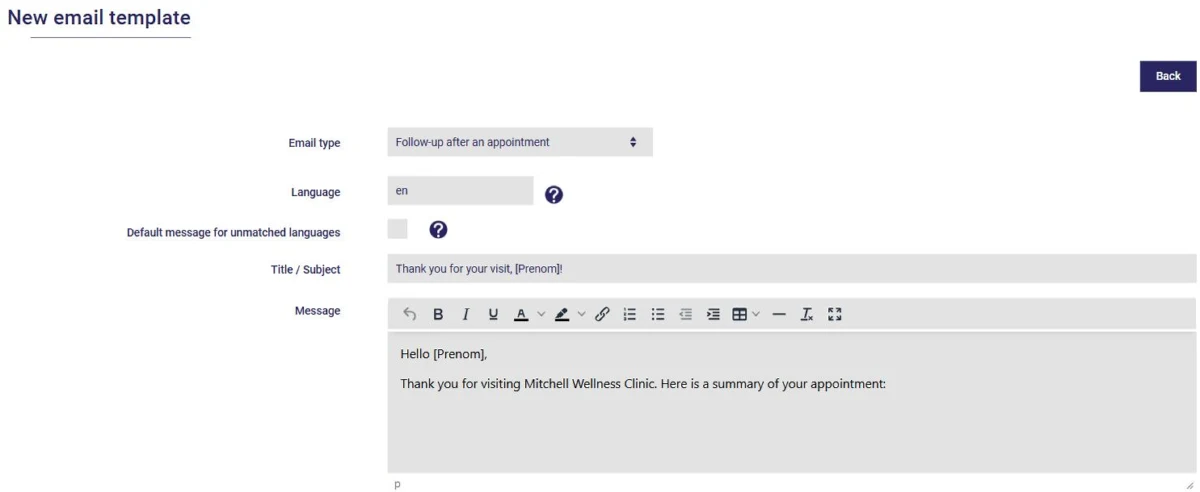
For emails related to an appointment or a group class, the message is split into two parts: the beginning and the end of the email. The appointment details (title, date, time and location) are automatically added in between.
Type [Prenom] and [Nom] in place of your client's first and last name: AssisTime replaces them when the email is sent. For invoices and receipts, [Date] and [No_fact] are replaced by the invoice date and number.
For invoice emails, a checkbox also lets you add a Pay the invoice button, which leads to online payment if a payment provider is set up for your ledger.
Don't forget to click Save. Your template will be used starting with your next emails!
Subscribe to our one-month free trial, without commitment!
You will be charmed by the interface and the ease of use!
